Difference between revisions of "Docker Jenkins SAML Configuration"
(→Lingoport Docker Jenkins SAML Configuration) |
(→Jenkins Configuration) |
||
| (One intermediate revision by the same user not shown) | |||
| Line 194: | Line 194: | ||
<p> |
<p> |
||
Go to Dashboard → Manage Jenkins → Manage and Assign Roles |
Go to Dashboard → Manage Jenkins → Manage and Assign Roles |
||
| + | <BR> |
||
| − | Select Assign Roles |
||
| + | Select Assign Roles on left |
||
</p> |
</p> |
||
<ol class="org-ol"> |
<ol class="org-ol"> |
||
| − | <li>Global Roles |
+ | <li>In the Global Roles Section select the Add Group Button</li> |
<li>Add Group name created in Okta (Ex. JenkinsOktaGroup) and select |
<li>Add Group name created in Okta (Ex. JenkinsOktaGroup) and select |
||
Admin checkbox</li> |
Admin checkbox</li> |
||
| Line 214: | Line 215: | ||
<p> |
<p> |
||
| − | Go to Dashboard &rarr Manage Jenkins &rarr System and scroll down to |
+ | Go to Dashboard → Manage Jenkins → System and scroll down to |
Restrict Project Naming |
Restrict Project Naming |
||
</p> |
</p> |
||
| Line 231: | Line 232: | ||
</p> |
</p> |
||
[[File:project_naming_role_based_enabled.png | 1200px | Jenkins Role Based Assignment]] |
[[File:project_naming_role_based_enabled.png | 1200px | Jenkins Role Based Assignment]] |
||
| − | |||
== Login Validation == |
== Login Validation == |
||
| Line 289: | Line 289: | ||
<p> |
<p> |
||
[https://www.okta.com/integrations/jenkins/#capabilities Okta Certification of SAML Plugin] |
[https://www.okta.com/integrations/jenkins/#capabilities Okta Certification of SAML Plugin] |
||
| + | </p> |
||
| + | |||
| + | <p> |
||
| + | [https://plugins.jenkins.io/saml/ SAML Plugin Page] |
||
| + | </p> |
||
| + | |||
| + | <p> |
||
| + | [https://plugins.jenkins.io/role-strategy/ Role-based Authorization Strategy Plugin Page] |
||
</p> |
</p> |
||
Latest revision as of 14:20, 7 November 2023
Contents
Lingoport Docker Jenkins SAML Configuration
This procedure describes the configuration of an Okta based SAML Identity Provider to a an existing Docker based Jenkins Service Provider
Prerequisites
- An Okta account is available and the person making the changes in that Okta account will have Administrative rights so they can create new Applications, Groups, and Users if needed.
- An existing Docker based Jenkins system is already in place and is functional for local users.
Backup the Existing config.xml File
Make a backup of the config.xml file in case something occurs during plugin install that could cause a lock out of the system by stopping the running container, copying the XML file to a safe location and restarting the container.
    $ sudo docker container ls
CONTAINER ID   IMAGE                       COMMAND                  CREATED         STATUS         PORTS                                                                                      NAMES
1924e0a6bf0d   jenkins/jenkins:lts-jdk11   <span style="color: #5b94ab;">"/usr/bin/tini -- /u…"</span>   2 minutes ago   Up 2 minutes   0.0.0.0:50000->50000/tcp, :::50000->50000/tcp, 0.0.0.0:8085->8080/tcp, :::8085->8080/tcp   peaceful_snyder
$ sudo docker stop 1924e0a6bf0d
$ cd /home/<USER>/docker/jenkins
$ cp -p ./config.xml ./config.xml_<MMDDYYYY>
Restart the Jenkins container and confirm that it is running properly
$ sudo docker start 1924e0a6bf0d
$ sudo docker container ls
CONTAINER ID   IMAGE                       COMMAND                  CREATED         STATUS         PORTS                                                                                      NAMES
1924e0a6bf0d   jenkins/jenkins:lts-jdk11   <span style="color: #5b94ab;">"/usr/bin/tini -- /u…"</span>   2 minutes ago   Up 2 minutes   0.0.0.0:50000->50000/tcp, :::50000->50000/tcp, 0.0.0.0:8085->8080/tcp, :::8085->8080/tcp   peaceful_snyder
Install Required Plugins
Log into Jenkins and go to Dashboard->Manage Jenkins->Plugins->Available plugins and search for saml
Select the checkbox under Install for the SAML plugin and for the Role-based Authorization Strategy plugin and the select "Install" on the upper right
Similarly search for "role" and select "Role-based Auhorization Strategy" plugin.
Install the SAML and Role Plugins
∗ Note that when this was initially installed there was an error occurred during the SAML plugin installed, however restarting Jenkins it showed installed so this should not be an issue if it is seen.
Okta Configuration
Follow the configuration outlined in this page for configuring the Okta system. Once that has been completed continue on with the steps outlined below in the Jenkins Configuration Section to configure Jenkins to the Okta system.
Jenkins Secured Authentication with Okta
Here is a summary of the Okta document contents:
- Log into the Okta Cloud instance
- Click on Applications → Applications on the left column
- If Jenkins is not presently added, select Browse App Catalog
- Search for "Jenkins" and Click "Add Integration"
- Give the installed Jenkins application a label
- For the Base URL - you may need to have a URL that will send the
user directly to the Jenkins login page. This may require
including the /jenkins to the end of the URL depending upon the
configuration.
- Adding the /jenkins at the end of this configuration may be needed if the interface gives an error when adding it initially.
- Create a Login for a user connecting to the Jenkins system by going to Directory → People and selecting "Add Person", filling out the required details.
- The user should appear in the "People" listing once added.
- Set an Okta Group by going to Directory → Groups → Add Group and providing a name for the Group
- Assign the previously created user to this Group by opening up the Group just created, select the "People Tab and select "Assign people"
- Add the Jenkins application to the group by selecting the Applications tab and clicking on "Assign applictions". Select the Jenkins application previously created.
- Return to the Jenkins application by selecting Applications → Applications → < JENKINS LABEL >
- Select "Edit" in the Settings box to configure the SAML 2.0 items
- Default Relay State - Leave empty
- Disable Force Authentication - Leave checked
- Configured SAML Attributes - Set the group to "Matches regex:.*
- Click on "View Setup Instructions" which should open up a new tab. Just leave it open at this point, it will be used during the Jenkins configuration
- In the Credential Details Section
- Set Application username format to "Okta username"
- Set Update application username on to "Create and update"
- Click "Save" at the bottom to Save the configuration.
Jenkins Configuration
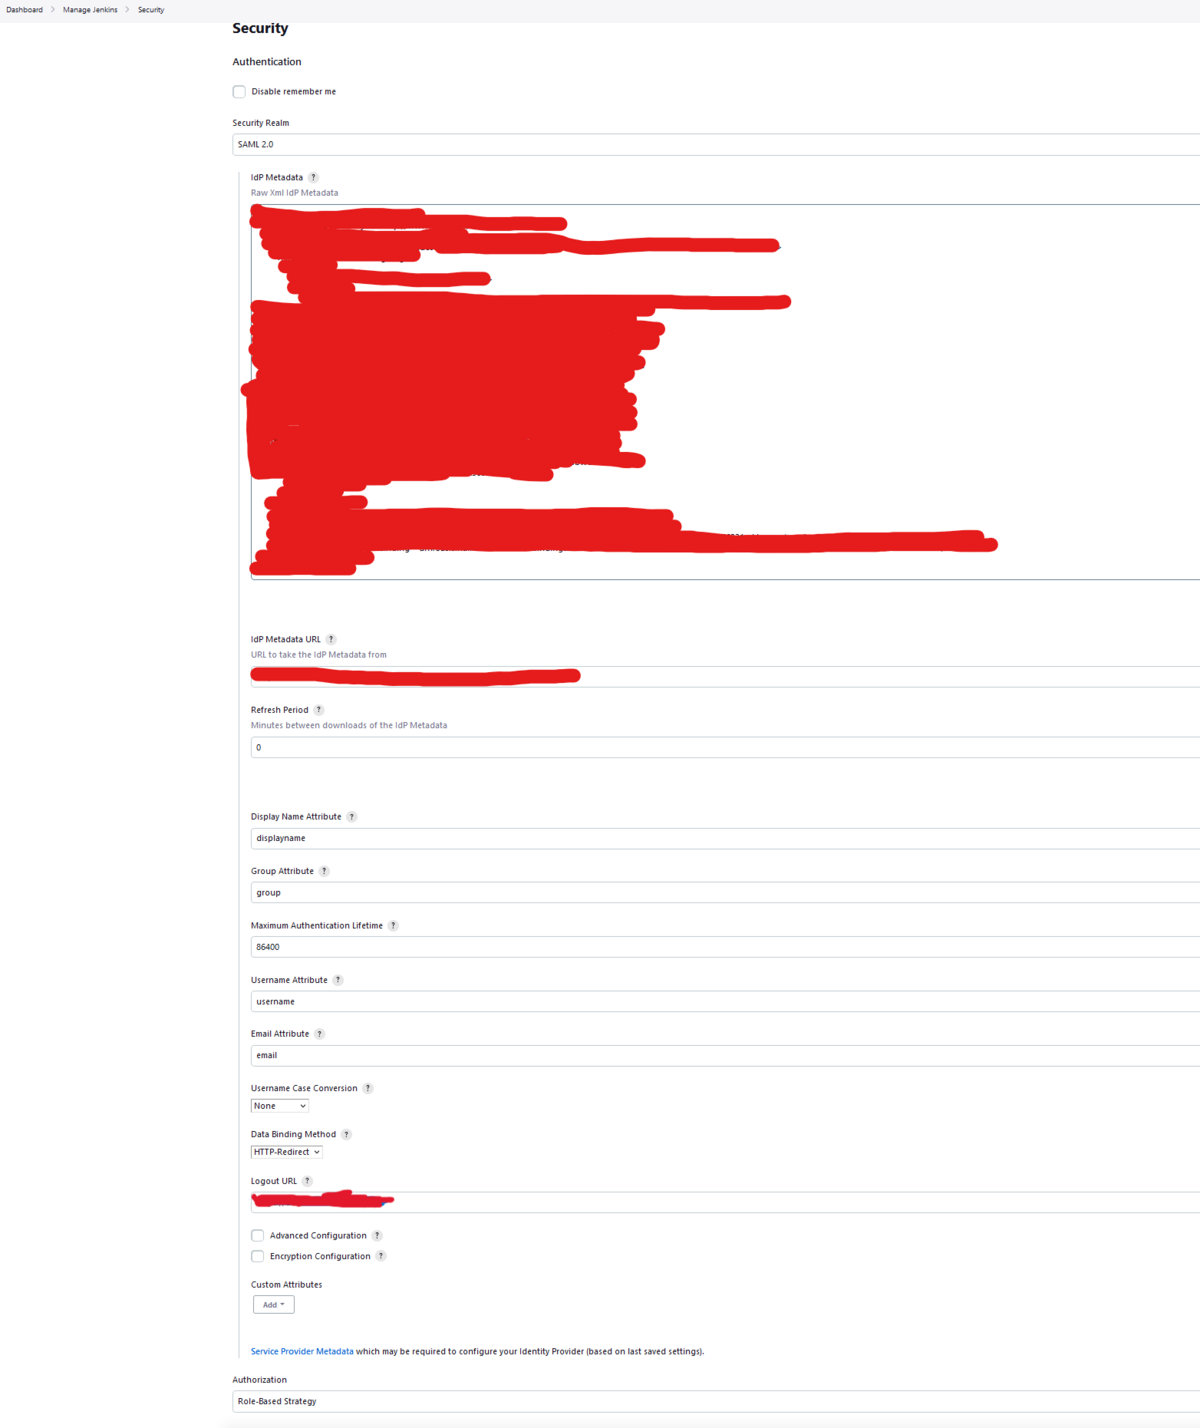
Go to Dashboard → Manage Jenkins → Security
The below will be shown
- Set the Security Realm Pulldown to SAML 2.0
- Copy the IDP Metatdata XML from the Guide previoulsly opened in a separate tab during the Okta configuration to the IDP Metadata Text box.
- Copy the IDP Metadata URL field from the Guide previoulsly opened up in a separate tab during the Okta configuration to the IDP Metadata URL box.
- In Display Name Attribute put "displayname"
- In the Group Attribute put "group"
- In the Username Attribute put "username"
- In the Email Attribute put "email"
- In the Username Case Conversion set the drop down to "None"
- In Data Binding Method set the drop down to "HTTP-Redirect"
- In the Logout URL - Copy the value from the Guide previously opened in a separate tab during the Okta configuration.
In the Authorization Section Select "Role-Based Strategy" in the drop down.
- This enables the Manage and Assign Roles menu in Manage Jenkins
Click Save
Below is a screenshot of the completed SAML Configuration Screen
Go to Dashboard → Manage Jenkins → Manage and Assign Roles
Select Assign Roles on left
- In the Global Roles Section select the Add Group Button
- Add Group name created in Okta (Ex. JenkinsOktaGroup) and select Admin checkbox
Click Save
Below is a screenshot of the Jenkins Okta Group Assignment
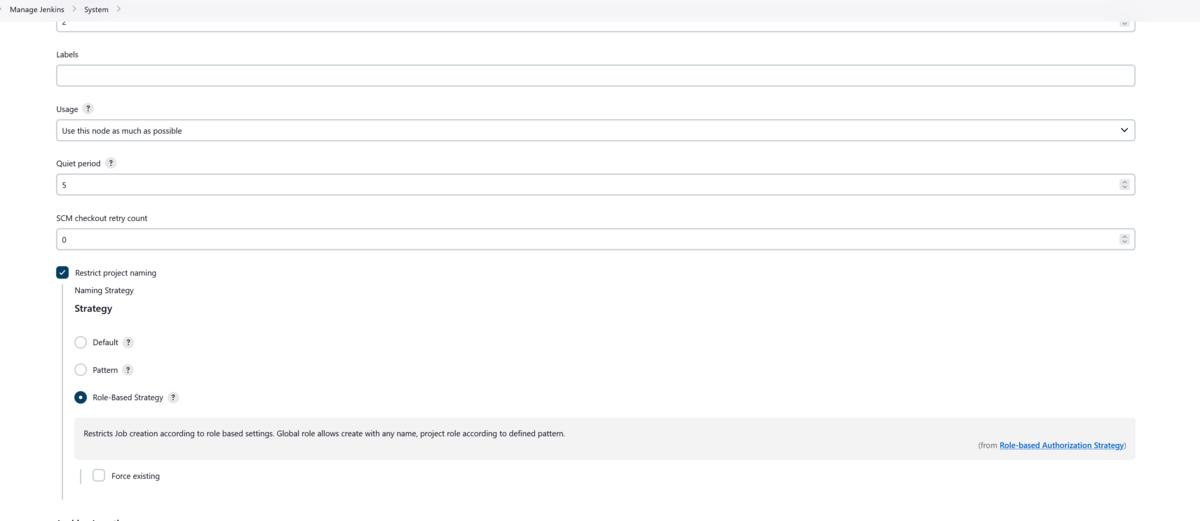
Go to Dashboard → Manage Jenkins → System and scroll down to Restrict Project Naming
- Select the checkbox "Restrict Project Naming"
- Select Role-Based Strategy
Click Save
Below is a screenshot of the the Restrict Project Naming configuration
Below is a screenshot of the Jenkins Role Based Assignment
Login Validation
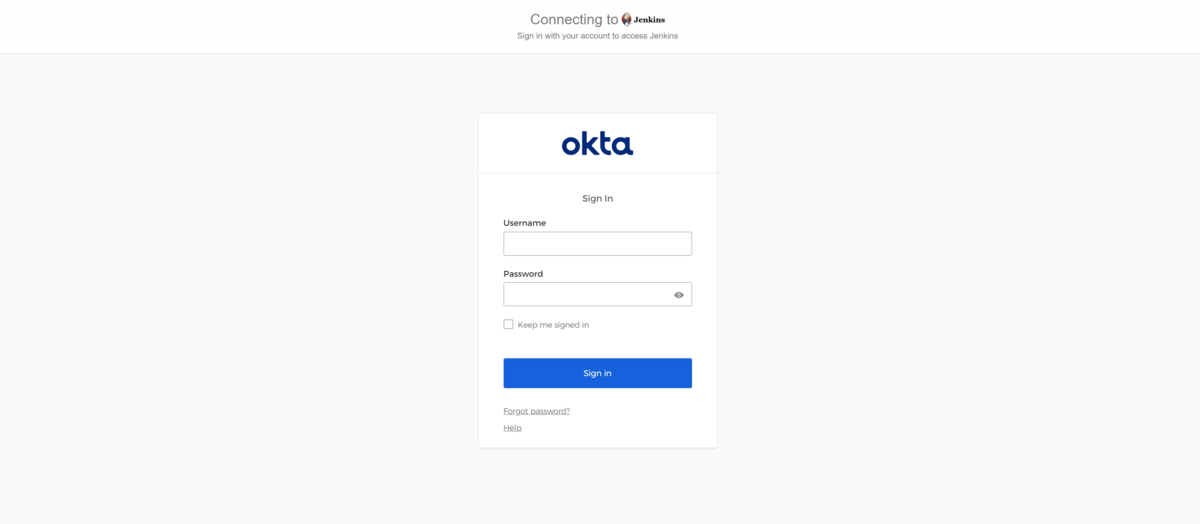
Using another browser go to the Jenkins URL. A redirection to the Okta Login page should occur automatically.
Login using the Okta Credentials not the local Jenkins credentials
The Jenkins Dashboard should be presented.
Note that all users will be logged in with Admin level privileges using this configuration. It may be something that could be modified if needed.
Operation Validation
There were no changes made to the Jenkins configuration that should impact the functionality of the Jenkins system outside of Authentication/Authorization but a sanity check should be performed.
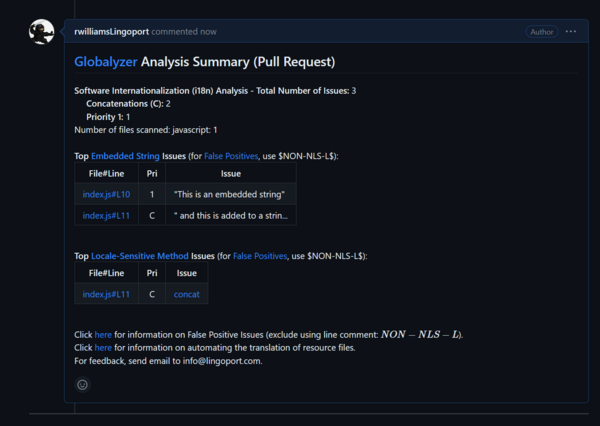
- Create a new pull request in Github. Confirm that the build runs on Jenkins and the comment from Globalyzer is posted to GitHub correctly
Below is an example of a comment message from Jenkins:
References
Jenkins Secured Authentication with Okta


