Difference between revisions of "Dashboard Users Guide"
(→MySQL Packet Error) |
(→MySQL Packet Error) |
||
| Line 81: | Line 81: | ||
<pre> |
<pre> |
||
[mysqld] |
[mysqld] |
||
| − | max_allowed_packet=16M |
+ | max_allowed_packet = 16M |
</pre> |
</pre> |
||
Stop the service, typically with: |
Stop the service, typically with: |
||
| − | sudo service mysqld stop |
+ | <pre> >sudo service mysqld stop </pre> |
verify it's stopped and restart it: |
verify it's stopped and restart it: |
||
| + | <pre> |
||
sudo service mysqld status |
sudo service mysqld status |
||
sudo service mysqld start |
sudo service mysqld start |
||
| + | </pre> |
||
| − | + | To verify the packet size allowed has been modified, in mySQL do : |
|
| + | <pre> |
||
| − | show variables like 'max_allowed_packet'; |
||
| + | mysql> show variables like 'max_allowed_packet'; |
||
| + | </pre> |
||
https://dev.mysql.com/doc/refman/5.7/en/packet-too-large.html |
https://dev.mysql.com/doc/refman/5.7/en/packet-too-large.html |
||
Revision as of 17:07, 18 May 2018
Contents
Introduction
About Lingoport Dashboard
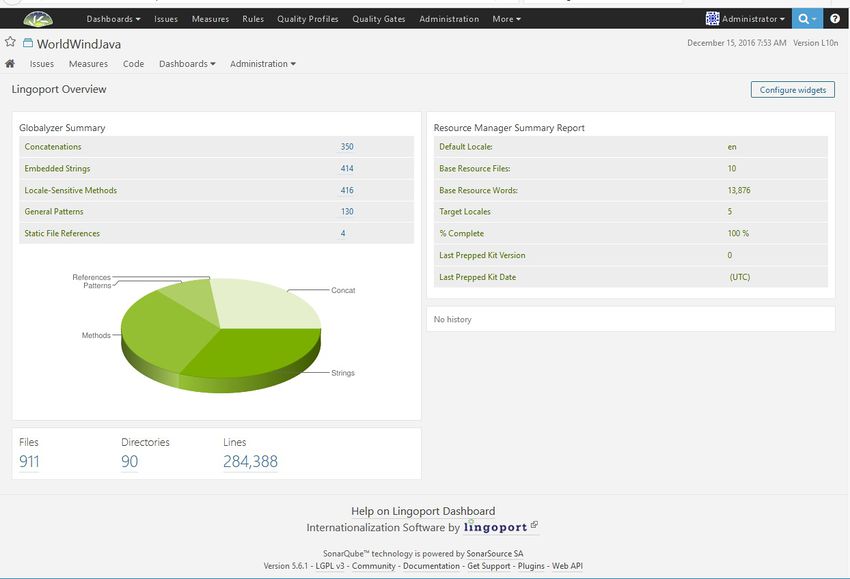
The Lingoport Dashboard, built on the SonarQube platform, helps you track and share the progress of your internationalization and localization efforts company-wide, by displaying both high-level and detailed views of your Globalyzer Project Scan data and your Lingoport Resource Manager status information.
For more details about Globalyzer and Lingoport Resource Manager please visit: Lingoport Suite.
When to Update the Dashboard Server
You will need to re-run the Lingoport Dashboard Server Installer whenever you upgrade to a later version of the Dashboard. Be sure to retain your current Dashboard database by unchecking the Install LINGODASH Database Data checkbox.
For more details, see Updating Your Existing Installation.
When to Update the Dashboard Client
You will need to re-run the Lingoport Dashboard Client Installer whenever you:
- Set up a new or updated version of Globalyzer
- Set up a new or updated version of Lingoport Resource Manager (LRM)
- Upgrade to a later version of the Lingoport Dashboard Client
Starting the Dashboard Server
Simple Startup
- On the system where the Lingoport Dashboard Server was installed, go to the directory
<server install directory>/bin. - Choose your platform directory and then run
sonar.sh start. To make sure that it started, check the statussonar.sh status. - Give it a few minutes and then open a browser and enter http://localhost:9000 to see the Dashboard. If you installed with a port other than 9000, use that port instead.
- If the browser comes up in maintenance mode, the database may need to be upgraded. Enter http://localhost:9000/setup and follow the directions on the page.
> cd /var/lib/jenkins/lingoport/dashboard-server-x.y.z/bin/
> cd linux-x86-64
> ./sonar.sh start
> ./sonar.sh status
Starting as a Service
To run the Sonar process as a service, follow the instructions at SonarQube.
Viewing the Lingoport Dashboard
- On your local system, open a browser and enter the host name and port number of the Lingoport Dashboard Server. For example: http://company.net:9000/
- Click the Help on Lingoport Dashboard link at the bottom of the page to learn more about the Lingoport Dashboard features.
- Read the SonarQube introduction to learn about the capabilities of the SonarQube framework.
- For administration features, click LOG IN in the menu bar and enter:
Login: admin
Password: admin
Be sure to change the password. As the Administrator, you will be able to adjust the dashboard configuration, as well as add Users and Groups to fine tune access to your Lingoport Dashboard Projects.
Uploading Project Data to the Lingoport Dashboard
Generate Globalyzer Scan Report
Generate LRM Status Report
Upload Globalyzer and LRM Data to Dashboard
Removing an Uploaded Lingoport Dashboard Project
Changing Project Configuration
sonar-project.properties
MySQL Packet Error
A communication packet is a single SQL statement sent to the MySQL server, a single row that is sent to the client, or a binary log event sent from a master replication server to a slave.
The largest possible packet that can be transmitted to or from a MySQL 5.7 server or client is 1GB.
When a MySQL client or the mysqld server receives a packet bigger than max_allowed_packet bytes, it issues an ER_NET_PACKET_TOO_LARGE error and closes the connection. With some clients, you may also get a Lost connection to MySQL server during query error if the communication packet is too large.
Both the client and the server have their own max_allowed_packet variable, so if you want to handle big packets, you must increase this variable both in the client and in the server.
To resolve this issue, please see the steps below:
Set max_allowed_packet in the /etc/my.cnf file. For example, to set the size for the server to 16MB, add the following lines in an option file:
[mysqld]
max_allowed_packet = 16M
Stop the service, typically with:
>sudo service mysqld stop
verify it's stopped and restart it:
sudo service mysqld status
sudo service mysqld start
To verify the packet size allowed has been modified, in mySQL do :
mysql> show variables like 'max_allowed_packet';
https://dev.mysql.com/doc/refman/5.7/en/packet-too-large.html
