Difference between revisions of "InContext Server Users Guide"
(→InContext Server Tokens) |
|||
| Line 6: | Line 6: | ||
Please browse to your InContext Server and log in with the above credentials: |
Please browse to your InContext Server and log in with the above credentials: |
||
* http://yourServerAddress:8081/incontext-server |
* http://yourServerAddress:8081/incontext-server |
||
| + | |||
| + | [[File:incontext-server-login.png|300px]] |
||
== Reset your Admin Password == |
== Reset your Admin Password == |
||
Revision as of 16:42, 1 March 2019
Contents
Browse to your InContext Server and Log In
When the InContext Server is installed, it creates one account with the following credentials:
- Username: Admin
- Password: please.reset.me
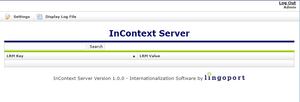
Please browse to your InContext Server and log in with the above credentials:
Reset your Admin Password
To reset your password, Click on the Settings link:
And then provide a new password and matching confirmation password.
Passwords need to be at least 6 characters in length and cannot be just spaces. Also, please retain this password as it cannot be recovered by Lingoport. Lingoport can reset the password for you if necessary.
InContext Server Tokens
The InContext Server manages two kinds of tokens to control access to the Server:
- Chrome Token
- Translation Token
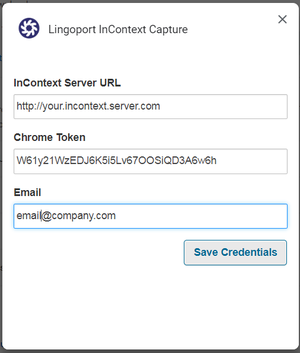
The Chrome Token is used by the Chrome Extension to send context to the Server. The value configured on the Chrome Extension must match what is configured on the InContext Server:
You can create multiple Chrome Tokens to give different groups of users access to the Server. In this way, if you decide to change the Chrome Token for one group of users, it will not affect the access for other groups of users.
The Translation Token is used to verify context lookups. When LRM sends out
Auto-capture this tab
- Right-click on InContext Capture icon and select "Auto-capture this tab"
- Wait for a second to let InContext Capture finish its sending
- When the status changes to green check
 , you could navigate to next page for auto-capture
 - When you finish your capture work, right-click on InContext Capture icon and select "Disable Auto-capture"
Note: If you navigate to a page without instrumented while Auto-capture turns on, the status will change to ![]() , and an error message will pop-up. If you would like to continue Auto-capture, you could close the pop-up and navigate to an instrumented page, the Auto-capture will still work.
, and an error message will pop-up. If you would like to continue Auto-capture, you could close the pop-up and navigate to an instrumented page, the Auto-capture will still work.

