Difference between revisions of "Installing with the Stack Installer"
(→Verifying the installation) |
(→Verifying the installation) |
||
| Line 70: | Line 70: | ||
Use the SERVER_URL_OR_IP value from the login-info.conf file. Browse to Jenkins: '''www.acme.com/jenkins''' |
Use the SERVER_URL_OR_IP value from the login-info.conf file. Browse to Jenkins: '''www.acme.com/jenkins''' |
||
| − | [[File:jenkins_after_install.jpg| |
+ | [[File:jenkins_after_install.jpg|700px]] |
Revision as of 20:13, 11 April 2017
Before Starting
Before installing the Stack Installer, you need to make sure that you have the prerequisites.
- You must have a Linux Server (CentOS or RedHat) (see current code levels) and a login with sudo access. You will need to be able to login to a console window to execute commands.
- The stack-installer-<version>.zip file from Lingoport. This should go into the login home directory.
- The LRM license information from Lingoport. This is your company name, number of projects licensed, the license expiration date and the license key.
- Login information to the Globalyzer Server which has the rulesets. If you are using Globalyzer's hosted server that will be [[1]], but you need a login and password.
Getting Started
- The first thing to do is to get the stack-installer-<version>.zip file on the Linux machine.
- Unzip the stack-installer-<version>.zip file. If this is a new Linux install, it might not have the unzip command installed yet.
> sudo yum install unzip
> unzip stack-installer.zip
> cd stack-installer
- Edit the
login-info.conffile.
- The Globalyzer Login details are the username and login for the Globalyzer Server.
- The Server Address or IP is the address of the machine you are installing. The one you are on right now.
- The Lingoport/LRM MySQL user and Lingoport Dashboard MySQL user can be left to the defauls values
- Make sure that all variable lines are uncommented.
# The installer will prompt you for various login information required to
# install the lingoport suite. Optionally, you may set that information here,
# in which case the installer will skip these prompts.

# Globalyzer Login details
GLOBALYZER_USER="betty@acme.com"
GLOBALYZER_PASS="abcdefgh"
GLOBALYZER_SERVER="https://www.globalyzer.com/gzserver"

# Server Address or IP
SERVER_URL_OR_IP="xyz.acme.com" # Alternately "http://some.domain.com"

# Lingoport/LRM MySQL user
LINGOPORT_MYSQL_USER="lingoport"
LINGOPORT_MYSQL_PASS="lingopwd"

# Lingoport Dashboard MySQL user
DASHBOARD_SONAR_USER="lingodashuser"
DASHBOARD_SONAR_PASS="lingodashpass"
- Edit the
lrm-license.conffile using the licensing information provided by Lingoport.
# The installer will prompt you for license information required to install
# the lingoport resource manager.  Optionally, you may set that information
# here, in which case the installer will skip these prompts.

# Lingoport Resource Manager (LRM) license details:
COMPANY_NAME="Acme"
LRM_MAX_PROJECTS="10"
LRM_LICENSE_EXPIRATION_DATE="2018-01-01"
LRM_LICENSE_KEY="9876543210"
Installing
- Run the
stack-configurer.sh. Leave passwords blank if possible.
./stack-configurer.sh
- Login as the newly created jenkins user and run
stack-installer.sh
> sudo su - jenkins
> cd stack-installer
> ./stack-installer.sh
Verifying the installation
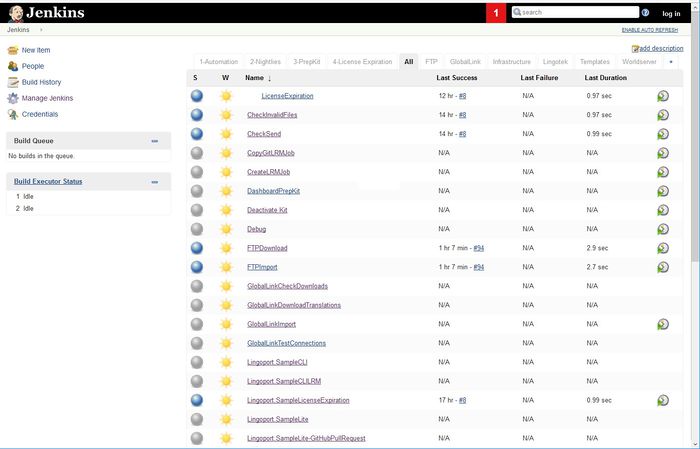
At this point, you can bring up Jenkins and the Dashboard in the browser and verify that they look correct.
Use the SERVER_URL_OR_IP value from the login-info.conf file. Browse to Jenkins: www.acme.com/jenkins
