Difference between revisions of "Setting Up LocalyzerQA On Premises"
| Line 1: | Line 1: | ||
| − | + | LocalyzerQA can be run from your own deployment, but there are some configuration steps that need to be completed first. |
|
* Login to LocalyzerQA. During the Stack Install process, LocalyzerQA is set up and should be ready to go. First, start the process. Login to the console and as a sudo user (not jenkins): |
* Login to LocalyzerQA. During the Stack Install process, LocalyzerQA is set up and should be ready to go. First, start the process. Login to the console and as a sudo user (not jenkins): |
||
Revision as of 21:47, 16 July 2021
LocalyzerQA can be run from your own deployment, but there are some configuration steps that need to be completed first.
- Login to LocalyzerQA. During the Stack Install process, LocalyzerQA is set up and should be ready to go. First, start the process. Login to the console and as a sudo user (not jenkins):
sudo systemctl start localyzerqa-server
To check the status - it should be 'running':
sudo systemctl status localyzerqa-server
- In a browser, go to https://my.url.com/localyzerqa. It should open up to the LocalyzerQA login page. If it doesn't, contact support@lingoport.com to troubleshoot the issue.
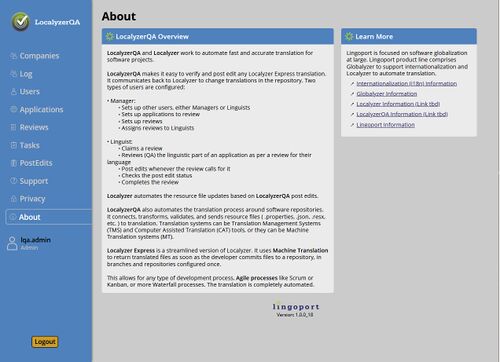
- Login as the administrator, using the email lqa.admin@lingoport.com and password please.reset.me. The LocalyzerQA About page will come up with several tabs on the side.
- Select the Users tab. Select lqa.admin@lingoport.com to edit the user. The email can be changed to something more relevant to the company. Also, change the password for the Admin user and select Update.
- Create the Company. Select the Companies tab and Create Company button and fill in the information.
- Add a Manager. Select the Users tab again and Create Manager. Add at least one Manager.
- At this point, the Admin user can log out and the new Manager can create more Managers and Linguists for the company.
