Difference between revisions of "Grant Users and Teams Access"
| Line 9: | Line 9: | ||
[[Optional Localyzer Settings |<== Back to Step 9: Optional Localyzer Settings]] |
[[Optional Localyzer Settings |<== Back to Step 9: Optional Localyzer Settings]] |
||
| − | ---- |
||
| − | |||
| − | [[Step by Step Project Creation |Step 1:Data Source Credential for the project]] |
||
| − | |||
| − | [[Choose a Repository|Step 2:Choose a Repository]] |
||
| − | |||
| − | [[Name The Project and Type |Step 3: Name the Project]] |
||
| − | |||
| − | [[Creating a Globalyzer Project |Creating a Globalyzer Project - Step 4: Globayzer Lite Definition File]] |
||
| − | |||
| − | [[Creating a Localyzer Project| Creating a Localyzer Project - Step 5: Which MT or TMS will Localyzer use ]] |
||
| − | |||
| − | [[What are the Localyzer locales| Step 6: What are the locales Localyzer is acting on? ]] |
||
| − | |||
| − | [[Resource File(s) Format| Step 7: Resource file formats]] |
||
| − | |||
| − | [[Include and Exclude Patterns|Step 8: Set up optional include or exclude patterns]] |
||
| − | |||
| − | [[Optional Localyzer Settings|Step 9: Optional Advanced Localyzer Settings]] |
||
| − | |||
| − | [[Grant Users and Teams Access | Step 10: Grant Users and Teams Access]] |
||
Revision as of 19:36, 5 September 2023
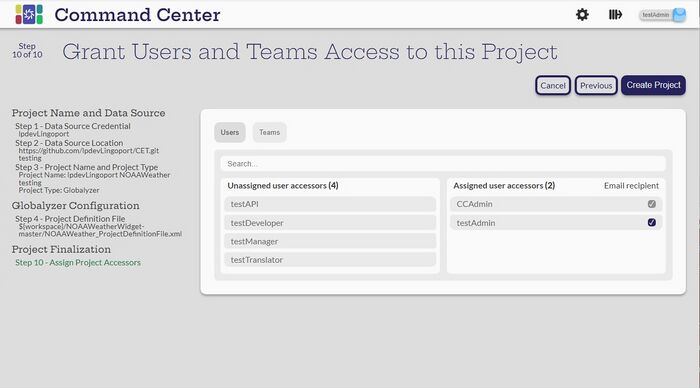
Select the Users and Teams that will have access to this project. Also verify the users that will receive email notifications for this project. Select Create Project.
The project will begin analyzing, if the system is not in Maintenance Mode. If it is, the project will be queued. The system will return to the Command Center Projects page.
