Difference between revisions of "Individual Project Tasks"
(→Localyzer) |
(→Localyzer) |
||
| Line 48: | Line 48: | ||
The Localyzer Icon [[File:LocalyzerIcon2.jpg|60px]] opens up the Localyzer Report page. The Localyzer page has a number of icons on the left side for actions that can be done. |
The Localyzer Icon [[File:LocalyzerIcon2.jpg|60px]] opens up the Localyzer Report page. The Localyzer page has a number of icons on the left side for actions that can be done. |
||
| − | [[File:SendKitToTranslation.jpg| |
+ | [[File:SendKitToTranslation.jpg|30px]] |
[[File:CheckImport.jpg|60px]] |
[[File:CheckImport.jpg|60px]] |
||
Revision as of 01:15, 22 February 2024
Contents
Introduction
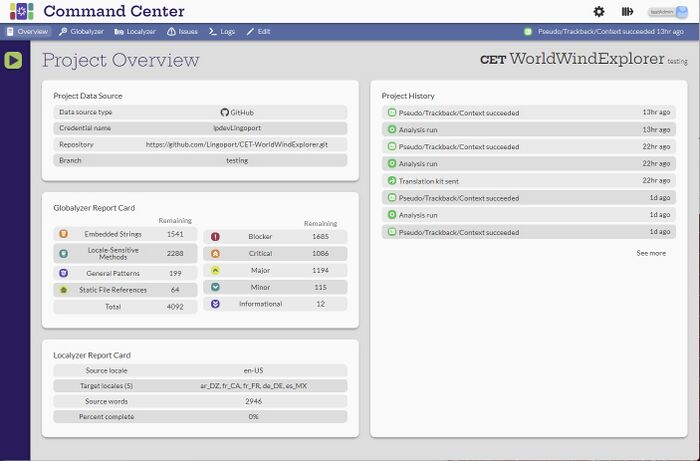
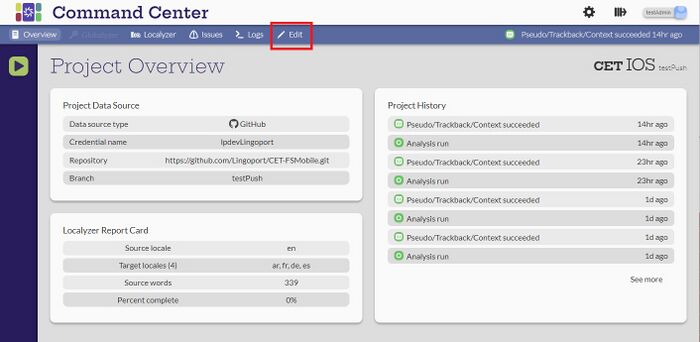
When a user selects a project name from the Projects page, the Project Overview page comes up with a summary of the project. There are a number of tabs on the top of the page. The tab that is selected is highlighted. For this example the Overview button ![]() is highlighted for the Project Overview page.
is highlighted for the Project Overview page.
- Overview - a summary of the project, showing the data source, history, and a summary of Globalyzer and Localyzer configuration
- Globalyzer - a detail of the Globalyzer information including the number of issues found
- Localyzer - a detail of the Localyzer information including the locales and translation status
- Issues - detailed information about the Globalyzer and Localyzer issues
- Logs - report of the various actions performed on the project.
- Configure - allows the user to modify the project.
Analyze Project
[Admin, Manager]
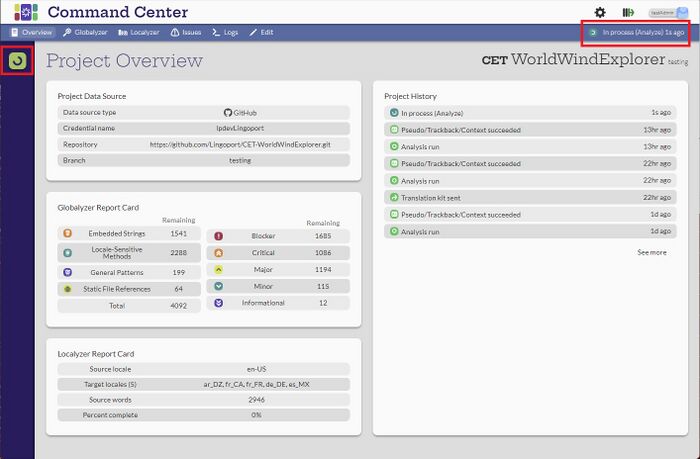
The Analyze Project icon ![]() will run the project. When the button is selected, the icon will be shown twirling and a message will come up about the job processing.
will run the project. When the button is selected, the icon will be shown twirling and a message will come up about the job processing.
Overview
[Admin, Manager, Developer, Translator]
Once a project is created, selecting its name will open the Project Overview. Note that the Overview tab ![]() on the top is highlighted. The Overview page is a project summary page, showing the Globalyzer and Localyzer summaries and the Project History. Any of the analysis lines are selectable and will open the corresponding logs.
on the top is highlighted. The Overview page is a project summary page, showing the Globalyzer and Localyzer summaries and the Project History. Any of the analysis lines are selectable and will open the corresponding logs.
The Analyze project button ![]() will run the project.
will run the project.
Globalyzer
[Admin, Manager, Developer, Translator]
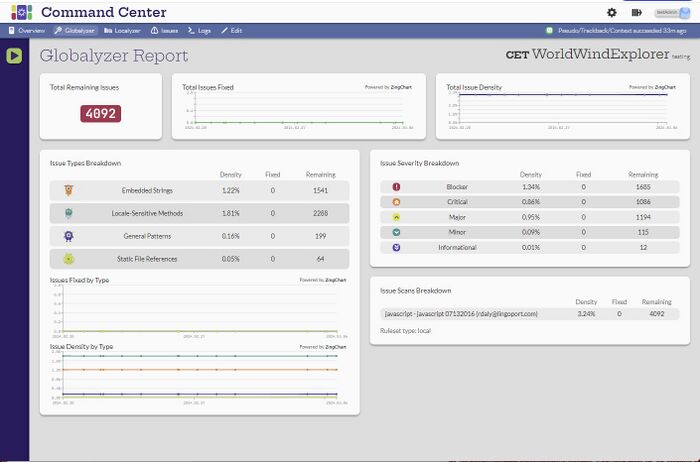
The Globalyzer Icon ![]() opens the Globalyzer Report page with the details of the Globalyzer analysis.
opens the Globalyzer Report page with the details of the Globalyzer analysis.
- Total Remaining Issues - all the issues that Globayzer has identified. This card is selectable and will take you to the Issues page.
- Total Issues Fixed - how many issues have been fixed since the project was created.
- Total Issues Density - number of issues divided by the number of lines of code that were scanned.
- Issues Types Breakdown - What types of issues were found.
- Issues Priorities Breakdown - A list of the severity of the issues.
- Globalyzer configuration - The rulesets used and the items scanned for.
Localyzer
[Admin, Manager, Developer, Translator]
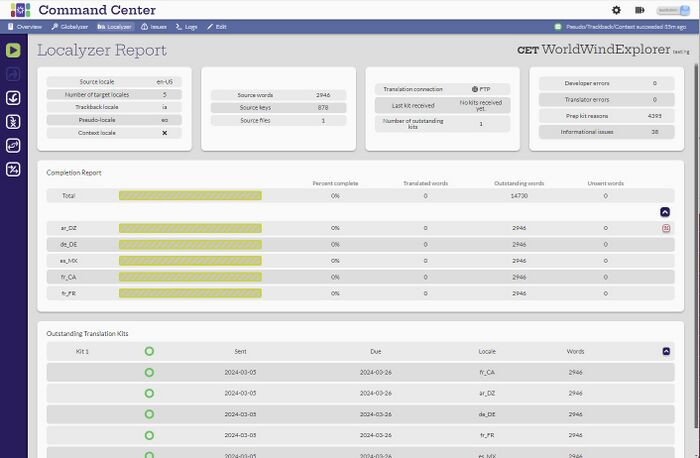
The Localyzer Icon ![]() opens up the Localyzer Report page. The Localyzer page has a number of icons on the left side for actions that can be done.
opens up the Localyzer Report page. The Localyzer page has a number of icons on the left side for actions that can be done.
Issues
[Admin, Manager, Developer, Translator]
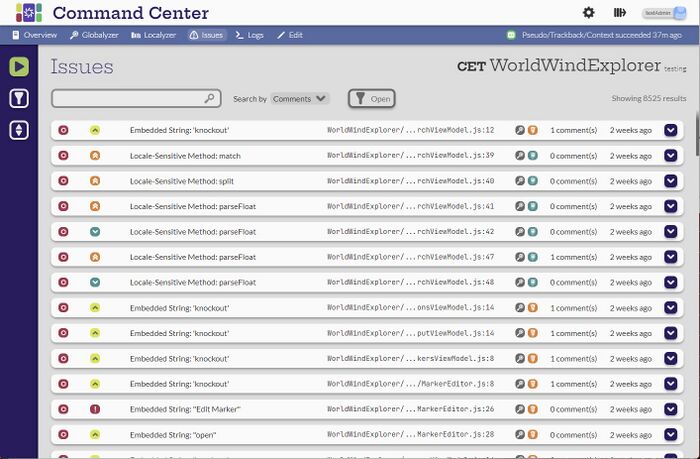
The Issues icon ![]() opens the Issues page and will show all the Globalyzer and Localyzer issues. Once the issues page is open, the issues can be searched, filtered and sorted.
opens the Issues page and will show all the Globalyzer and Localyzer issues. Once the issues page is open, the issues can be searched, filtered and sorted.
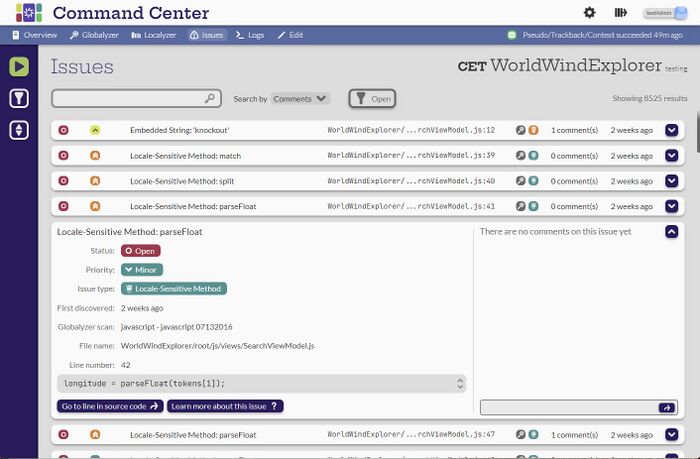
Selecting an issue in the list will show more detail about the issue, including its status, type and priority.
- Go to line in source code - will take the user to the line of code in the repository, for users with repository access.
- Learn more about this issue - will open up documentation about the issue.
Console logs
[Admin, Manager, Developer, Translator]
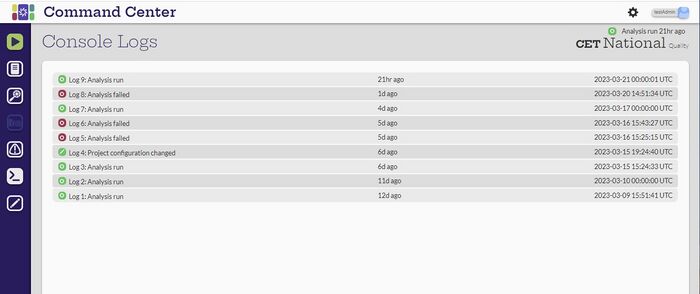
The Console Logs icon ![]() opens up the logs to show when the project has been analyzed. Selecting any of the lines will open the log and show more detail.
opens up the logs to show when the project has been analyzed. Selecting any of the lines will open the log and show more detail.
Project configuration
[Admin, Manager]
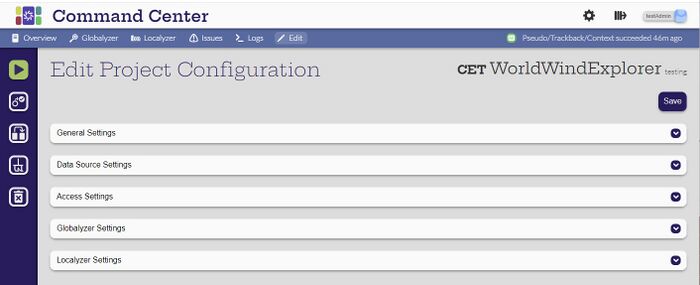
The project configuration icon ![]() will open the Edit Project Configuration page
will open the Edit Project Configuration page
Edit a project
There are multiple ways to get to edit a project.
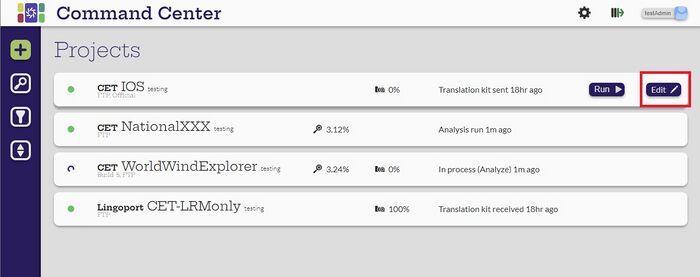
First, from the Projects page, hover over the project and the Edit button will appear.
Second, select the project name (or the Globalyzer or Localyzer icon) to go to the Overview, Globalyzer or Localyzer page. Select the Project Configuration button on the left to get to the Edit Project Configuration page.
From this page, any of the settings can be changed.
- Delete - remove the project completely
- Duplicate - make a copy of the project. The name must be changed at the very least to save the project.
- Clean - removes the workspace so that it must be populated again.
When changes are made and saved, a notice appears at the top of the screen about the project being updated. The project does not run until it is manually run or by an automated task.
