Localyzer Projects
Contents
Creating a project in Jenkins
New project
LRM creates projects using a Project Definition XML file that contains information about the resources and types for translation and then calling the Create Project Command.
This is automated in Jenkins with the Lingoport plugin.
To create a new project:
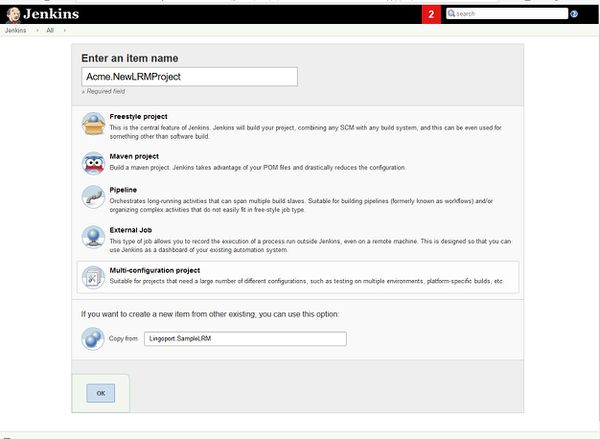
- Select New Item from the menu on the left
- In the dialog box, enter the name of the new project. The name must be of the form <group>.<project>, where the group is the name associated with the LRM license. If you are unsure about the group name, a Jenkins job called <group>.LicenseExpiration should have been created at installation. Use that <group> name.
- In the Copy from box, enter Lingoport.SampleLRM or LingoportSampleLiteLRM.
Note-a project can be created using either the project definition file directly on the command line or through the Jenkins LRM Plugin.
Configure the project
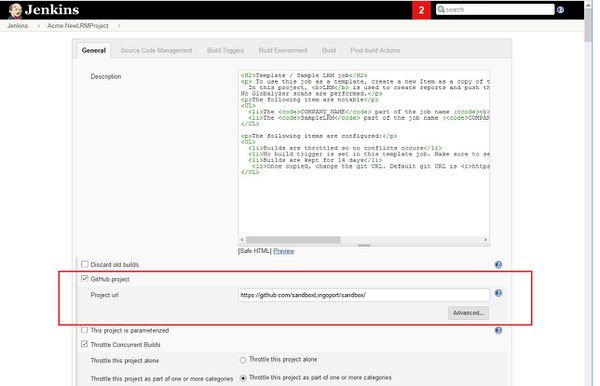
Set the git directory
Set the Project url to the URL for the GitHub repository with the code.
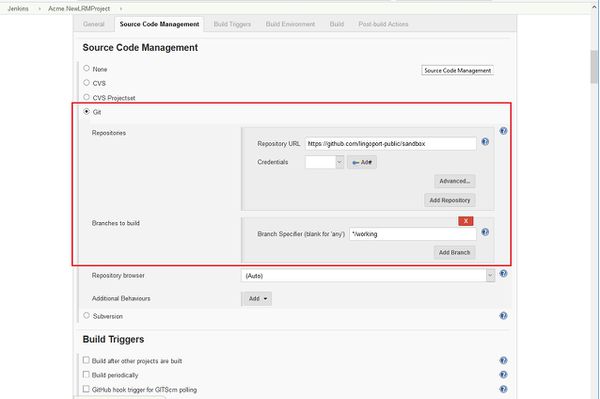
Set the repository info and the branch name for the code.
Set up the Git Repository and the branch
Make sure that the Repository URL and the Branch Specifier are correct.
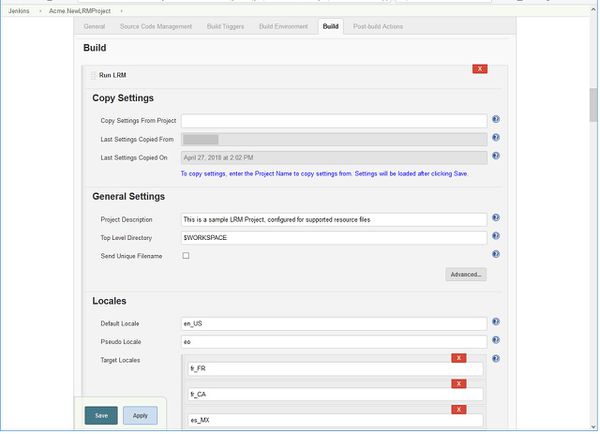
Set the General Settings and Locales
The Top Level Directory is defaulted to $WORKSPACE. That means that LRM looks at the whole repository to find the resource files. This can be changed to look at only specific directories if you know where the resource files are kept.
The Send Unique Filenames checkbox is unchecked. Check this if the resource files are in the form:
folder1:
  en_US.properties
folder2:
  en_US.properties
There are two resource files called en_US.properties. These will be given unique filenames in the prep kit when sent to the translation system and then imported back to the correct location.
Any number of locales in various formats including LCID can be entered.
Set up the Resource File Extensions
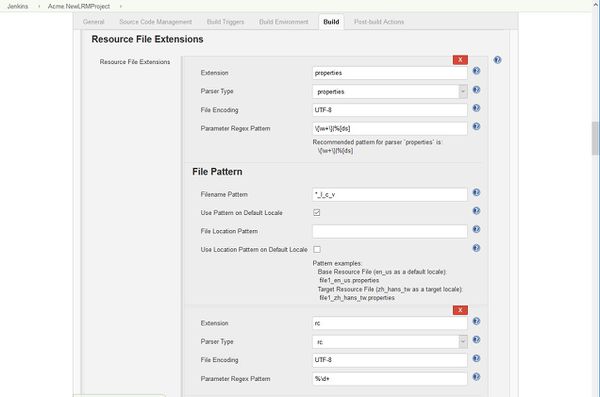
- In this example, the resource file type extension and parser type is 'properties' and 'rc'.
- We are using the default Parameter Regex Pattern.
- The Filename pattern is *_l_c_v which means that it expects filenames to be in the form 'something_xx_yy.properties'.
- Since Use Pattern on Default Locale is checked, LRM will look for the Filename pattern on the resource file for the default locale.
- File Location Pattern is empty, so all the resource files will be located in the same directory.
- Use Location Pattern on Default Locale is unchecked. It can't be checked if File Location Pattern is empty, but it tells what the directories will look like for the base and translated resources.
- Using these variables, the Jenkins job gives and example of the Base Resource File. It should be of the form
file1_en_us.propertiesand the target resources will be of the formfile1_zh_hans_tw.properties. If the resource files do not conform to these settings, errors and missed files might occur.
Set the directories and emails
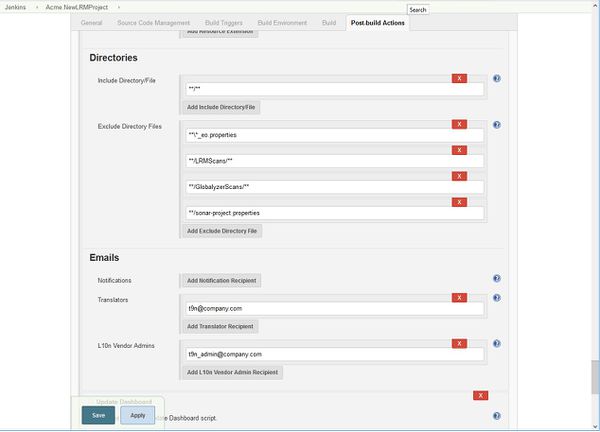
- The Include Directory/File defaults to
**/**. All the code in the repository is included. More directories or files can be included. - The Exclude Directory Files have pre-filled entries for
**\*_eo.properties(any pseudo-localized files),**/LRMScans/**,**/GlobalyzerScans/**and**/sonar-project.properties(all Lingoport files that don't have repos). More files can be excluded as needed. - The email addresses need to be set up to indicate who should receive the various notifications. More than one address can be set for each notification.
Save the values and return to the Jenkins menu. Enable the project, if it is disabled and select Build Now from the menu to create the new project.
Check the Results
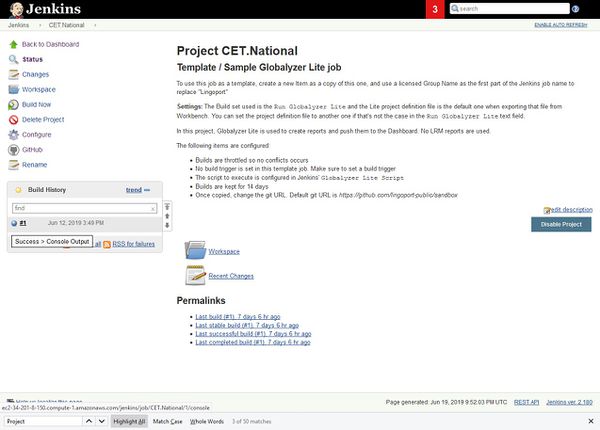
After the project builds, there is a red or blue indicator under the job's Build History. Select the indicator to see the Console Output for the newly created job.
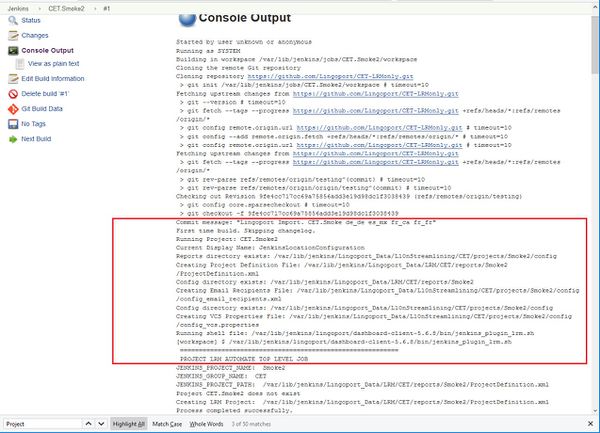
The Console Output can be daunting, but there are a few things to verify.
- Since this is the first time running, the Project Definition File and several other configuration files will be created.
- Verify that ERROR does not occur anywhere in the output.
- At the bottom of the the output, it should say ANALYSIS SUCCESSFUL and END UPDATE DASHBOARD.
At this point, the Lingoport Dashboard should have been updated with the project information.
If any of these criteria are not met, troubleshoot the project before moving forward.
