Gerrit Data Source Credential
Revision as of 18:46, 17 November 2023 by Prosenthal (talk | contribs)
Creating a Gerrit Data Source Credential
[Administrator]
The Administrator can create the data source credentials by selecting the ![]() (Create new credential) button on the Manage Data Source Credentials page.
(Create new credential) button on the Manage Data Source Credentials page.
Select the Gerrit card
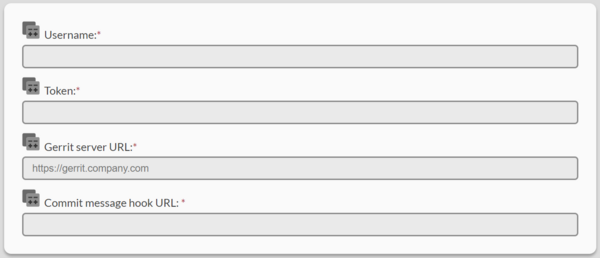
Enter a username, access token, server URL, and commit message hook URL.
- The username will be the user who authors the commits that are pushed back to the repository.
- The token is an HTTP access token associated with the username that you entered. To generate a new token:
- Log into your company's Gerrit web interface as the user you entered above.
- Go to your User Settings page.
- Select HTTP Credentials on the left navigation bar, or scroll down to that section in the page.
- Click GENERATE NEW PASSWORD, and copy and paste the token that it shows you into the token section of the Gerrit Credential page in Command Center.
- We also recommend storing this token somewhere secure that you can access as well if you ever need to reference it in the future, because each time you generate a new token, it will invalidate the old token associated with the account, and for security reasons, neither the Gerrit web interface nor Command Center will ever show you this token again.
- The server URL is the prefix before the repositories that you would clone.
- The commit message hook URL is the url that you would make a curl request to in order to add the commit message hook that adds the change ID required by Gerrit.
- Usually the Gerrit web interface will give you one command to copy and paste in order to clone a repository. Here is an example of how to parse that command out into your server URL and your commit message hook URL:
- Given the command:
git clone "https://gerrit_username@gerrit.your-company.io/orgname/reponame" && (cd "reponame" && mkdir -p .git/hooks && curl -Lo `git rev-parse --git-dir`/hooks/commit-msg https://gerrit_username@gerrit.your-company.io/tools/hooks/commit-msg; chmod +x `git rev-parse --git-dir`/hooks/commit-msg) - The server URL would be:
gerrit.your-company.io/ - The commit message hook URL would be:
https://gerrit_username@gerrit.your-company.io/tools/hooks/commit-msg
- Given the command:
- Once you are finished configuring the form, click Next in the top right corner of the page.
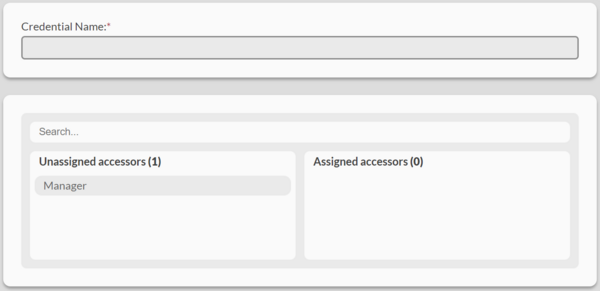
Give the new credential a name and optionally grant access to managers
- The credential name is required, and it is how you will identify the credential for use later on.
- Granting access to manager users is optional.
- All administrator users on the system will have access to the credential.
- Only the manager users that you designate access to will be able to use the credential. They will not be able to modify the credential even if they have been granted access.
- No other users on the system will have the ability to access the credential at all.
- When you are satisfied with your credential name and manager access, click Create in the top right corner of the page.


