Setting Up LocalyzerQA On Premises
LocalyzerQA can be run from your own deployment, but there are some configuration steps that need to be completed first.
- Login to LocalyzerQA. During the Stack Install process, LocalyzerQA is set up and should be ready to go. First, start the process. Login to the console and as a sudo user (not jenkins):
sudo systemctl start localyzerqa-server
To check the status - it should be 'running':
sudo systemctl status localyzerqa-server
- In a browser, go to https://my.url.com/localyzerqa. It should open up to the LocalyzerQA login page. If it doesn't, contact support@lingoport.com to troubleshoot the issue.
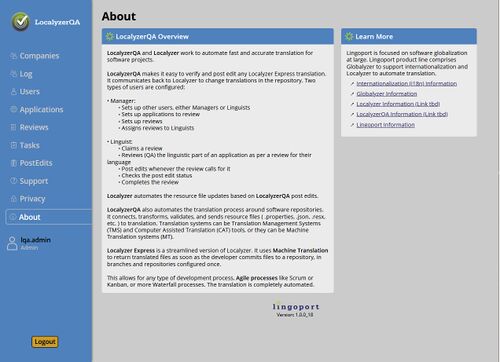
- Login as the administrator, using the email lqa.admin@lingoport.com and password please.reset.me. The LocalyzerQA About page will come up with several tabs on the side.
- Select the Users tab. Select lqa.admin@lingoport.com to edit the user. The email can be changed to something more relevant to the company. Also, change the password for the Admin user and select Update.
- Create the Company. Select the Companies tab and Create Company button and fill in the information.
- Add a Manager. Select the Users tab again and Create Manager. Add at least one Manager.
- At this point, the Admin user can log out and the new Manager can create more Managers and Linguists for the company.
The administrator user is the only user that can see the Log. Otherwise from this point forward, the Managers and Linguists can do anything else.
Return to [LocalyzerQA Configuration] to continue.
