InContext Server Installation
Contents
Checking InContext Server Installation
The typical G11n system can be installed using either the Lingoport Stack Installer or a Docker-based method. Depending on the installation method used, the process to check if the InContext Server is installed will differ.
Checking Installation for Systems Installed with Lingoport Stack Installer
If your system was installed using the Lingoport Stack Installer, check the installation with:
$sudo systemctl status incontext-server
Output should indicate if the service is active. If the service is not found, it needs to be installed manually.
Checking Installation for Docker-based Systems
For systems intending to use the Docker-based installation, check if the Docker container for the InContext Server is running with:
$ sudo docker ps | grep incontext-server
If there's no output, the container is not running, indicating the InContext Server needs to be set up or there is an issue that needs to be addressed. Users in the 'docker' group may optionally omit use of sudo.
Docker-based Installation of InContext Server
For a new, simplified deployment process, the InContext Server can be installed using Docker. This section outlines the Docker-based installation process.
Requirements
- Docker installed on your system
- Configuration details prepared in `install.conf`
Installation Process
- Modify the `install.conf` file with your specific configurations, including Docker Hub credentials (account with read access to the InContext Image will be shared by Lingoport), MySQL root password, and desired server port.
- Execute the `InstallIncontext.sh` script with sudo privileges. This script will:
- Create necessary Docker network and volumes
- Pull the Lingoport InContext Server image from Docker Hub
- Start the InContext Server and MySQL containers with appropriate configurations
Verify the installation by checking the Docker container status and accessing the InContext Server through the web browser.
Script Execution
$ sudo ./InstallIncontext.sh
You may be prompted if there is missing info in the install.conf. Ensure you follow any prompts provided by the script for a successful installation.
Manual Installation
For systems not utilizing Docker or needing a specific setup, manual installation is also available.
InContext Server Installation Requirements
- Java 11
- MySQL 8
- Tomcat 9.0.x
Installation Steps - Docker
1. Download and unzip the `IncontextServer-<version>.zip` file. 2. Modify `install.conf` with necessary details. 3. Execute `./install.sh` with sudo privileges.
Installation Steps - Non-Docker
1. Download and unzip the IncontextServer-<version>.zip file from our SFTP site.
2. Change directory: cd incontext-server
3. Modify install.conf to set the values required by the install. Any information left blank will be prompted by the install script.
MYSQL_ROOT_PASS- this is the password that was used or created by the Stack Installer or Stack Updater.INCONTEXT_MYSQL_USER / INCONTEXT_MYSQL_PASS- this is a new MySQL username and password.INSTALL_TOMCAT_HERE='/usr/local/tomcat'- Unless there is reason to change the location, leave it at the default.
4. Run the install script (note you must have sudo privileges): ./install.sh. If it is successful, one should see:
Incontext Server successfully installed.
InContext Server Files
There are three files that comprise the InContext Server. The Lingoport InContext Server automated installation process will put these files in the appropriate location.
- incontext-server.war
- incontext-server.sh
- IncontextServerConfig.groovy
Installation Steps - Non-Docker
−
The incontext-server.war is the server itself and must be placed under the tomcat/webapps directory.
−
The incontext-server.sh file is a script for starting/stopping the InContext Server and must be configured and placed in the tomcat directory.
− The IncontextServerConfig.groovy file is the configuration file for the InContext Server and must be configured and placed in the tomcat directory.
−
Running the InContext Server - Non-Docker
To start the InContext Server:
$sudo systemctl start incontext-server
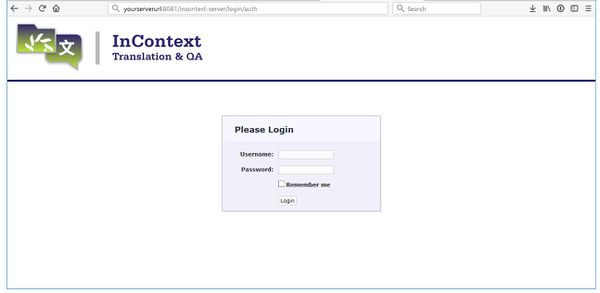
Then browse to: http://yourserverurl:8081/incontext-server
To stop the InContext Server:
$sudo systemctl stop incontext-server
To check the status of the InContext Server:
$sudo systemctl status incontext-server
Next Steps
Whether installed via Docker or manually, the next steps involve configuring and using the InContext Server for your localization needs. For more details on post-installation setup and usage, refer to the InContext Server Users Guide.
InContext Capture Installation provides additional resources for setting up InContext for Translation.
For information on how to proceed after installation, please see the: InContext Server Users Guide
