What are the Localyzer locales
Contents
Introduction
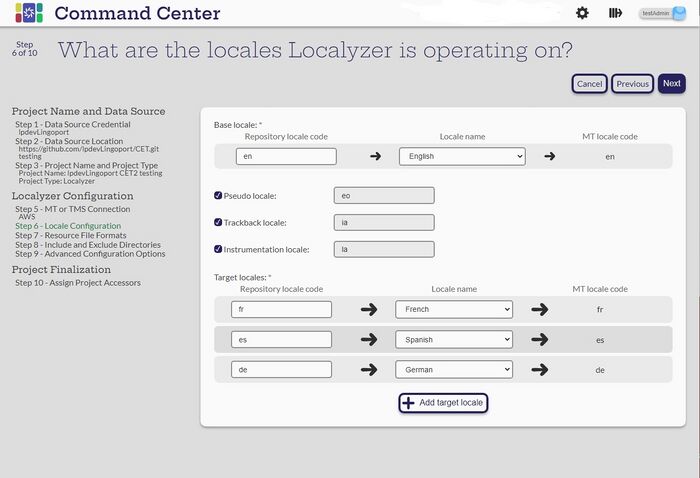
- Select the Base locale that will be used. Generally it is en, but can also be en_US or en-US.
- Select if Pseudo locale, Trackback locale or Instrumentation locale will be done for this project. These have default values that can be changed. If these are selected, another process is added after the job analysis.
- Select the Target locales and match it to the Locale Name. Different Machine Translation and Translation Management Systems have different lists of locales.
Note: The repository locale is automatically mapped to the locale code of the TMS. The locale codes of the TMS or MT are configured during the TMS or the MT set up. Here, for French (France), it is 'fr'. The repository locale is set for each repository, as it can be in this example 'fr', or 'fr-FR', or 'France', or 'French'.
Select Next
<== Back to Step 5: Which MT or TMS will Localyzer use?
More Locale Configuration
Pseudo, Trackback and Instrumentation Locales
The resource files with these extensions look like translated files in the repository, but serve different purposes.
- Pseudo-localization shows what translated files with more characters and non US-ASCII characters would look like even before any translation takes place. It is used to gauge what translations will look like in code. The pseudo locale defaults to eo and can be changed as needed. For information on pseudo-localization, see: https://lingoport.com/what-is-pseudo-localization/ and the Pseudo-Localization section in this document.
- The trackback locale creates mapping files between a running application and the resources found in the repository.. The trackback locale defaults to ia and is used in conjunction with LocalyzerQA. Configuring this locale is required for LocalyzerQA.
- The instrumentation locale is not used at this stage, it will be used for additional features in the future.
Base and Target Locales
- You can change the base and target locales by selecting the dropdown menu under “Locale name” in their respective sections. Changing the locale will automatically change the repository locale code and MT locale code as well.
- You can also manually change the repository locale code as needed (for example, if your resource files use en-US instead of en or fr-FR instead of fr).
- Additional target locales can be added by selecting the Add target locale button below the list of locales.
- Locales can also be removed by hovering over the respective row and selecting the red trash icon.
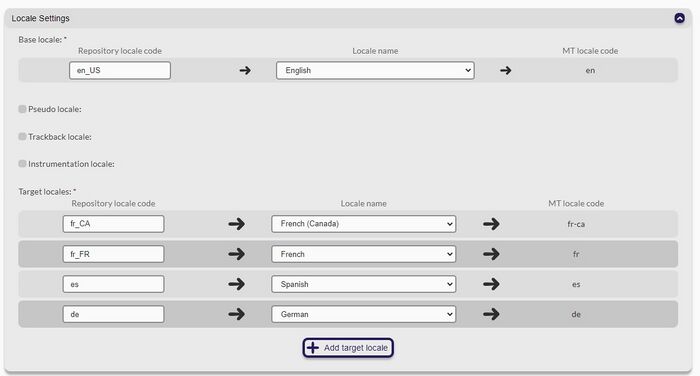
Example: If the base resource file is file_en_US.properties and the target locales are fr_FR, fr_CA, es, de. The page will look like:
And the resulting target files will be file_fr_FR.properties, file_fr_CA.properties, file_es.properties and file_de.properties.

